Debate rages in the amp builder world about how to do heater wiring, here's my take on the matter.
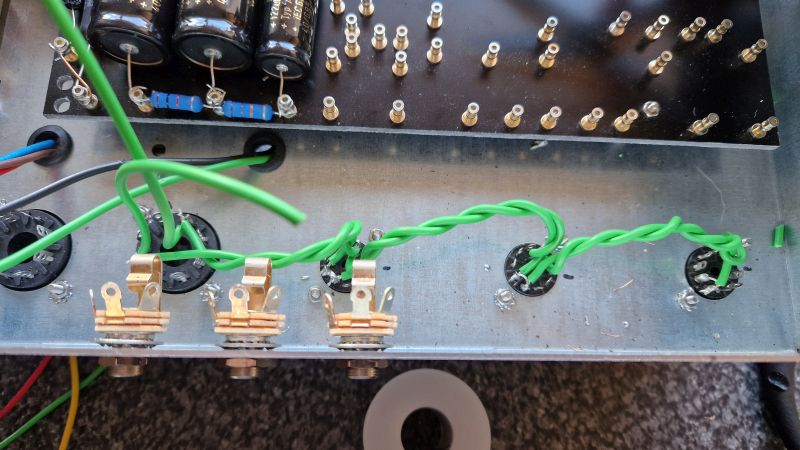
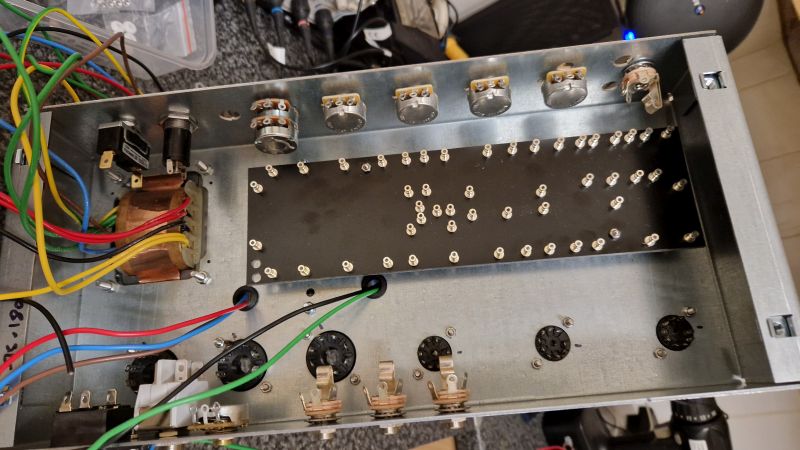
The important thing to achieve is to have the two ends of the AC supply placed so as to avoid creating an electric field that surrounds the grid connections. Every variation I've seen involves laying the heater cables flat against the chassis but this inevitably makes some part of the circuit surround the socket terminals. The solution I settled on was to run the supply standing off the chassis and angled down into the centre of each tube socket. These need a few cables ties as pictured but will keep electric fields as far as possible from the signal electrodes.
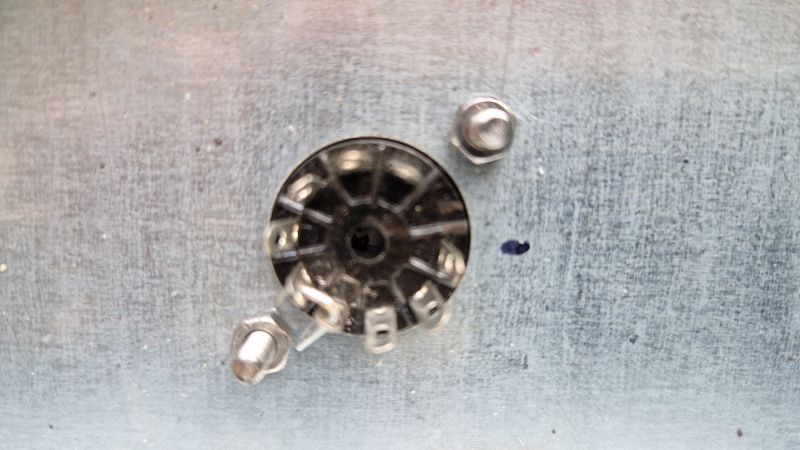
As the 9-pin sockets need to be chained together, a bit of planning goes a long way when attaching the wires. First step is to place (not solder) a wire bridging pins 4 and 5.
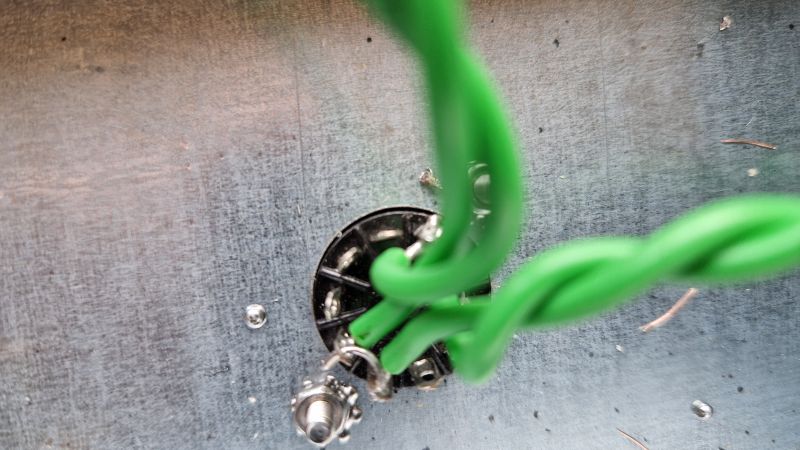
Then add a supply wire to pin 5 and solder that terminal only. Solder two wires into pin 9 to chain the sockets together, add the wire to pin 4 and run this to the next socket in the chain.This avoids trying to thread cable into already-soldered terminal holes and makes for a very neat set of heater wires.
Here's a thing I've wanted to do for a very long time! A few shipments of vacuum tubes, turretboards, faceplates, capacitors, carbon resistors and other components means I'm embarking on an amplifier kit build. This is a Supa Deluxe kit from Modulus Amplification, a souped-up version of a Fender Deluxe with a full tone stack and a master volume.
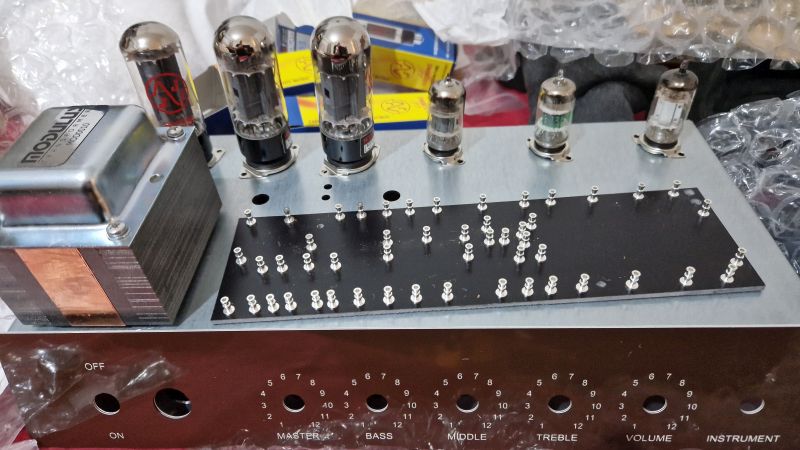
The chassis has a cutout for three preamp tubes but the schematic only calls for two so I'm wondering if this could be adapted to add a reverb or maybe a valve-driven effect loop copied from a Mesa Boogie circuit.
I haven't built a turretboard amp before so this is really challenging at first but very much more satisfying than just populating a PCB. The important thing is to wrap all the component leads in the same direction around the turrets to avoid partially unwinding the previous components.
Still waiting for Modulus to build the tweed headshell cabinet. It may even arrive before I finish wiring this thing together.
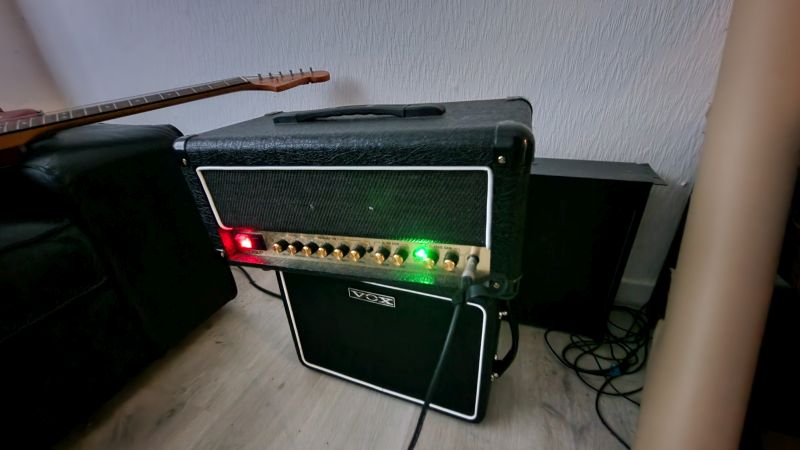
An eBay special has arriived - a Marshall DSL20 head in condition best described as "gigged". Seller told me it had some crackling noises and probably needed new output valves. Consequently it was on the market at a ridiculously low price so I had to reach for the credit card. Here's what arrived ...
First rule with a possibly dodgy amp is DON'T PLUG IT IN. Instead I removed the chassis screws and did the usual safety checks on the innards, looking for things like bad solder joints or leaking capacitors. Everything looked fine but fuck me, Marshalls are not built the way I remember. All the valves are mounted on a PCB, including the EL34 output tubes that run a fair amount of plate current and generate a considerable amount of heat so this may be a problem in the future. Also concerning to see just how small the filter capacitors are on this amp. Where you would expect to find axial caps on a tagboard, here the capacitors are radials about half the size of "normal" ones and mounted straight onto the PCB.
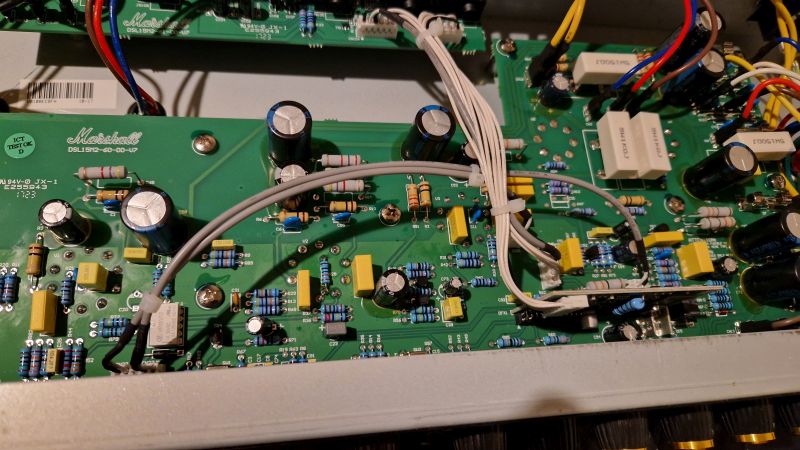
Even weirder was the reverb unit, a small DSP board slotted vertically into the main PCB. Not a great sound but better than nothing and rather surprisingly for a low-price amp there is an effects loop so it'll take a Strymon or an EvenTide. Or maybe even the BOSS GT-1000CORE. To be determined at a later date. For now this looks like a great little amp to take to jam sessions.
Anyway, a pair of new ElectroHarmonix EL34's have worked wonders and while it's not a classic Plexi sound, it's near enough for just under £210. Just a bit depressing to see Marshalls churned out from a factory in Vietnam rather than built with care in Milton Keynes.
WARNING: Intensely techy nerd post, feel free to skip this one
Right then. The ESP32 microcontroller was a non-starter. MIDI over USB just wasn't working so we're on plan C now, using WebMIDI in the browser and wonder of wonders. it works surprisingly well. There's a bit of configuration hacking to do in order to enable WebMIDI in the browser but then it's all Javascript callback functions, a shitload of modules and classes and a CSS felxgrid front end. While that has fored me to relearn a lot of web scripting skills it seems to have been worth it as this can now do MIDI clock, program change and controller change. I would have liked some facility to process clock bytes without buffering but you can't have everything. Maybe I'll look into handling those in another thread.
Other planned development includes using IndexedDB to handle program changes and patches but that's a long way down the road. Runs acceptably well on a Raspberry Pi but the tricky touchscreen might mean I just shift this all onto a laptop running Ubuntu.
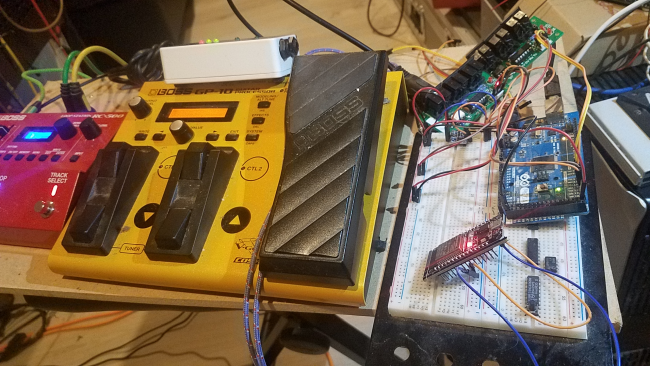
This is the latest nightmare of wires and microcontrollers, my MIDI pedalboard controller to route clock and program change round the two pedalboards. When (if) finished it will (should) allow me to use the RC-500 Loop Station as a master MIDI clock for all the pedals while receiving program change from the BOSS GP-10. Those program changes select a "super patch" from SD card on a LOLIN D32 Pro ESP32 MCU which selects different program changes for the three Eventide pedals.
I originally planned this with a web interface using ESPAsyncWebServer and JSON but that's been scaled back due to lack of available memory but it may just expand into a second ESP32 board to provide Wifi connectivity and web front end. A work in progress.
I've been taking a break from analogue circuits to investigate the world of DSP using an ESP32 microcontroller and the Faust DSP librares. This has been quite an adventure involving building my first dedicated Linux computer with PlatformIO running in Microsoft VS Code. So far I've got it running three sawtooth oscillators, a noise source, triangle LFO, amplitude and pitch envelopes and a simulated Moog resonant filter. The I2S interface produces impressive 24-bit sound quality at 48kHz sampling rate. Unfortunately the Faust delays and reverbs seem to make the processor brown out and it goes into a reboot cycle. More work required. Or possibly just a lot more memory. That couldn't hurt. The crackling noises are due to having the record level turned up too far rather than any problem with the synth.
Just got this one completed and working. Uses the classic (reissued) CEM3340 chip as used in so many classic synths like the Sequential Prophet 5, Roland SH-101 and many others. The PCB wasn't quite right so I had to bodge wire a resistor and capacitor into the CV mixing section, not really worth fabricating a new PCB though as the finished module works very well.
After several failed PCBs, we now have a working version that reads frequency from the modular! So far I've burned out four Arduino Nanos and a 20x4 LCD display module but we're getting closer to a working unit all the time. Next step is writing the rest of the firmware for the Nano to control the DAC and the 4066 switch.
I stumbled across a video demo of a clone of the Buchla LPG on Youtube and was phenomenally impressed. So much so that I knew I had to build one. It's an ancient type of filter using Vactrols, a combination of an LED and a light-dependent resistor to effect a frequency response change. And it sounds wonderful.
The first PCBs aren't quite right, I managed to omit the two voltage tracks to the ICs so this first version is patched up with a couple of bodge wires to make it work. Only smoked one opamp making it, a new record.
To assist in my electronic endeavours I have treated myself to the very wonderful Rigol DS1054Z digital storage oscilloscope and BLIMEY, it is good. This machine does everything from FFT analysis to SPI bus decoding in realtime (almost). It's a four-channel scope, brilliant for watching the channels of something like an SPI or I2C bus.

So naturally the first thing I'd want to connect up was my modular synth. Here's the MakeNoise DPO oscillator outputs running in hard sync mode. FFT shows the harmonics and already I can see that I need to turn up the sweep extent trimpots for the pulse width modulation on two of my other oscillators.

The scope has LAN connectivity, PNG waveform saving to USB memory stick, hundreds of features you might normally expect to pay twice the asking price for.
And by illicitly googling "RIGLOL" you can find a page that lets you enable the paid performances for free.
Not that I condone such behaviour.