Debate rages in the amp builder world about how to do heater wiring, here's my take on the matter.
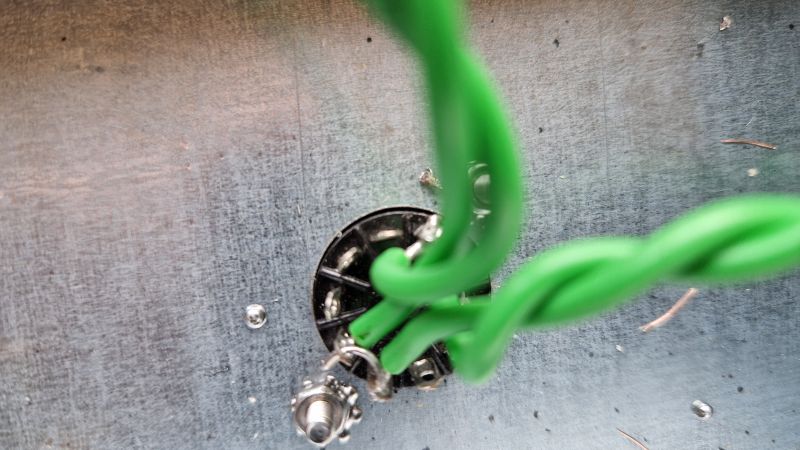
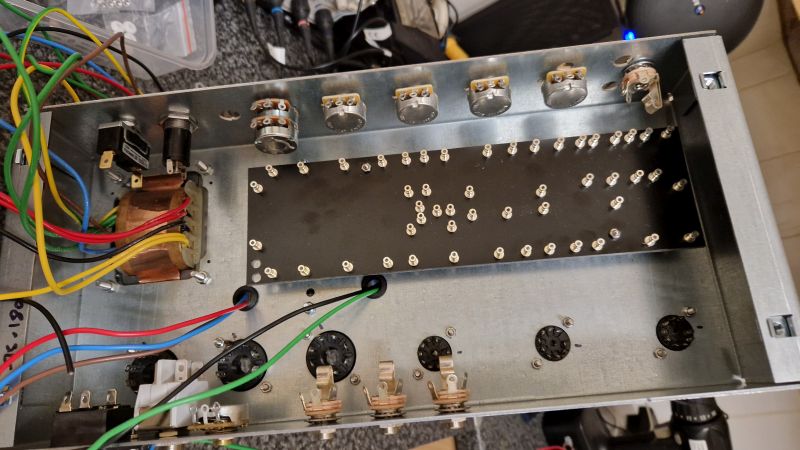
The important thing to achieve is to have the two ends of the AC supply placed so as to avoid creating an electric field that surrounds the grid connections. Every variation I've seen involves laying the heater cables flat against the chassis but this inevitably makes some part of the circuit surround the socket terminals. The solution I settled on was to run the supply standing off the chassis and angled down into the centre of each tube socket. These need a few cables ties as pictured but will keep electric fields as far as possible from the signal electrodes.
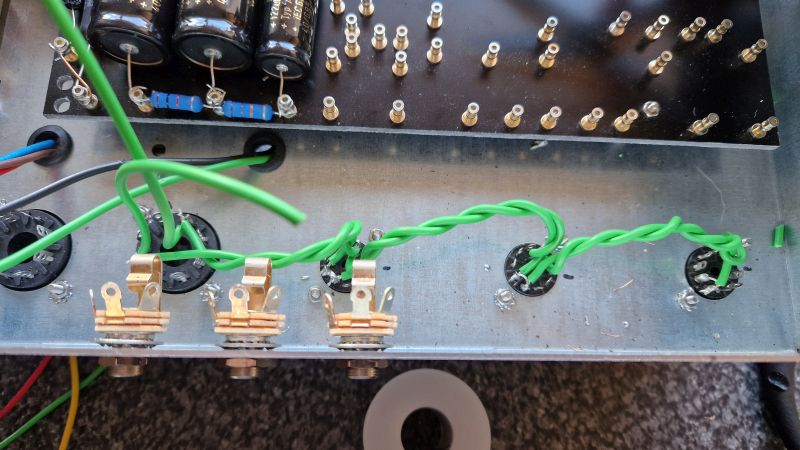
As the 9-pin sockets need to be chained together, a bit of planning goes a long way when attaching the wires. First step is to place (not solder) a wire bridging pins 4 and 5.
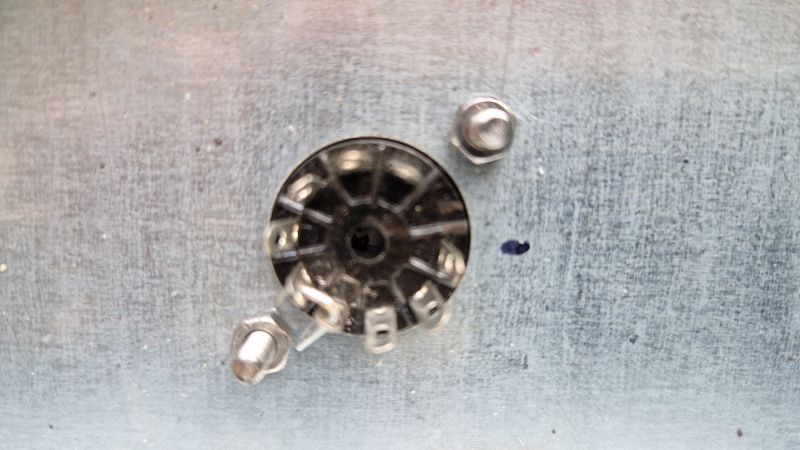
Then add a supply wire to pin 5 and solder that terminal only. Solder two wires into pin 9 to chain the sockets together, add the wire to pin 4 and run this to the next socket in the chain.This avoids trying to thread cable into already-soldered terminal holes and makes for a very neat set of heater wires.
Here's a thing I've wanted to do for a very long time! A few shipments of vacuum tubes, turretboards, faceplates, capacitors, carbon resistors and other components means I'm embarking on an amplifier kit build. This is a Supa Deluxe kit from Modulus Amplification, a souped-up version of a Fender Deluxe with a full tone stack and a master volume.
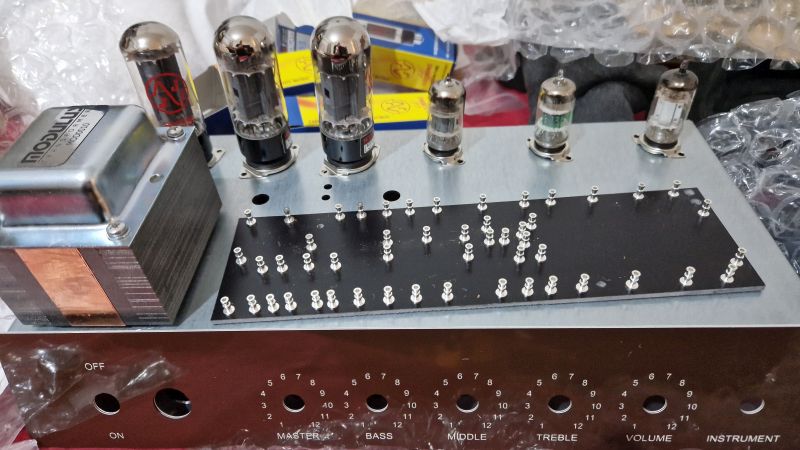
The chassis has a cutout for three preamp tubes but the schematic only calls for two so I'm wondering if this could be adapted to add a reverb or maybe a valve-driven effect loop copied from a Mesa Boogie circuit.
I haven't built a turretboard amp before so this is really challenging at first but very much more satisfying than just populating a PCB. The important thing is to wrap all the component leads in the same direction around the turrets to avoid partially unwinding the previous components.
Still waiting for Modulus to build the tweed headshell cabinet. It may even arrive before I finish wiring this thing together.
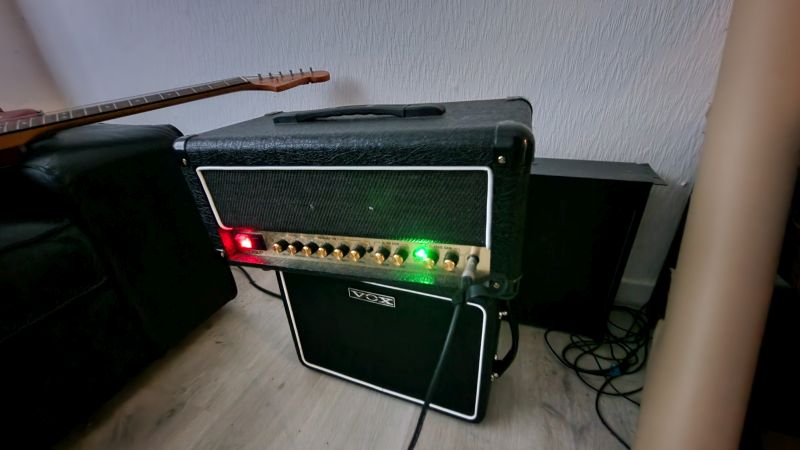
An eBay special has arriived - a Marshall DSL20 head in condition best described as "gigged". Seller told me it had some crackling noises and probably needed new output valves. Consequently it was on the market at a ridiculously low price so I had to reach for the credit card. Here's what arrived ...
First rule with a possibly dodgy amp is DON'T PLUG IT IN. Instead I removed the chassis screws and did the usual safety checks on the innards, looking for things like bad solder joints or leaking capacitors. Everything looked fine but fuck me, Marshalls are not built the way I remember. All the valves are mounted on a PCB, including the EL34 output tubes that run a fair amount of plate current and generate a considerable amount of heat so this may be a problem in the future. Also concerning to see just how small the filter capacitors are on this amp. Where you would expect to find axial caps on a tagboard, here the capacitors are radials about half the size of "normal" ones and mounted straight onto the PCB.
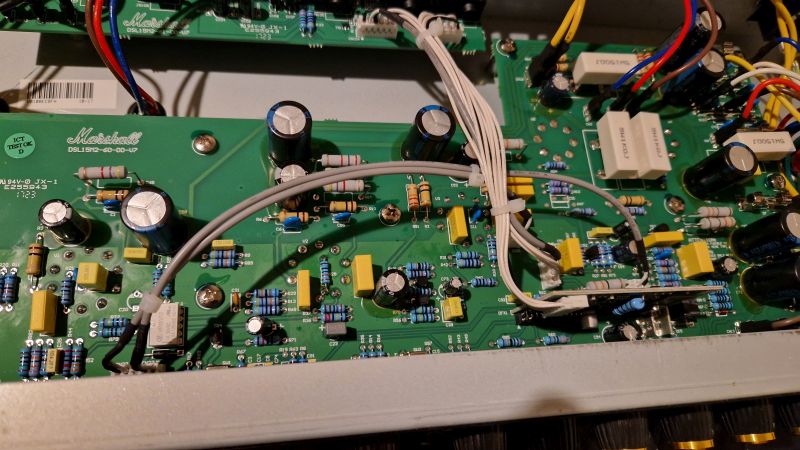
Even weirder was the reverb unit, a small DSP board slotted vertically into the main PCB. Not a great sound but better than nothing and rather surprisingly for a low-price amp there is an effects loop so it'll take a Strymon or an EvenTide. Or maybe even the BOSS GT-1000CORE. To be determined at a later date. For now this looks like a great little amp to take to jam sessions.
Anyway, a pair of new ElectroHarmonix EL34's have worked wonders and while it's not a classic Plexi sound, it's near enough for just under £210. Just a bit depressing to see Marshalls churned out from a factory in Vietnam rather than built with care in Milton Keynes.
Spent the last few weeks rehearsing a few songs with singer Ali Dickinson for an acoustic set. After randomly deciding to start recording a practice session, I went on to overdub a couple more guitar tracks and the end result was quite pleasing.